Woodshop Corner: Scrape Your Cabinet’s Surface Like a Pro
- A cabinet scraper is a key tool that removes small amounts of material. It does especially well in tricky areas of hardwoods where traditional hand planes would cause tear-out.
- The three main types of scarpers are the standard, the gooseneck, and the specialized scraper.
- In addition to their conventional uses, scrapers can be used for projects like flushing up a face-frame to a plywood side, trimming off the extra lip of edge banding, or scraping clean a veneer Dutchman.
A cabinet (or “card”) scraper is hardly a fancy tool, but it is a mighty one—despite looking like a piece of scrap. But it’s far more than that. At its most basic, a scraper removes small amounts of material. It does especially well in tricky areas of hardwoods where traditional hand planes would cause tear-out.
I find them a better choice than sandpaper in many applications. Scraping often leaves a cleaner surface than sanding does. It also doesn’t create wood pore dust, nor does it leave a fuzz of torn fiber. (Even the finest grit sandpaper will leave some of that.)
The Different Types of Scrapers
Many folks, if not most, who work with scrapers use the term cabinet scraper interchangeably with card scraper. There are differences: Basically, a card scraper is shaped like a card, while a more traditional cabinet scraper has grips.
Here are three basic types of scrapers:
Standard
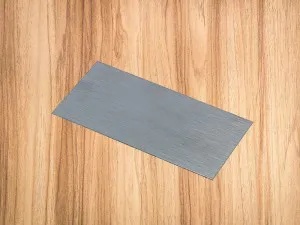
You can buy a standard scraper in many shapes and sizes, with a rectangular 3″ x 6″ being the most common. You can also fabricate your own and make it whatever size you want.

A “card scraper” looks unimpressive, but it’s a tool that yields mighty results when it comes to smoothening surfaces.
Gooseneck
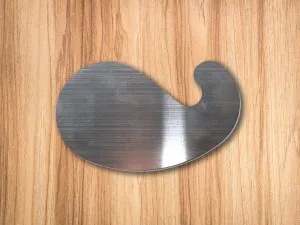
The rectangle doesn’t work great on a curve. Luckily, for curves, there is something called a gooseneck scraper. It looks like a French curve ruler. (No need for a beret…unless that’s your thing.)

Gooseneck scrapers are ideal for curves.
Specialized
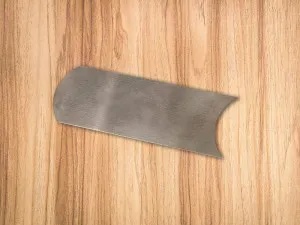
These types of scrapers are ideal for convex shapes (like the fingerboard on a violin)— a must if you happen to be building something for the New York Philharmonic. This is just one example of specialized variations.

Specialized scrapers come in all sorts of shapes. This kind is used for convex shapes.
Sharpening a Scraper
I could do a full blog on sharpening a scraper, but here’s quick overview instead:
- Flatten the edges. Start with a flat edge. Rub the scraper around in circles on sandpaper (300-400 grit is fine), or run a file over the working edge of the scraper.
- Burnish. To burnish, you need a unique instrument called a burnisher. It’s just a steel rod with a handle. Don’t worry: they’re cheap and readily available. Place a few drops of oil on a rag and rub it all over the burnisher’s rod end. Hold the rod flat against the side of the scraper for a few passes to create a burr pointing away from the edge.
- Turn the burr. Roll the burr back down. Place the rod along parallel to the scraper, then tilt the handle about 15°, push down, and slide the burnisher along the edge of the scraper slowly. This leaves a tiny hook on the edge for scraping. (Odds are you won’t see it since it requires a magnifying glass to see it, but you can feel it.)
- Sharpening is essential to maintaining a scraper’s edge—be it often-used or even brand-new. Proper sharpening ensures you get the most from your scraper.
Using a Scraper (Properly)
When done right, the scraper leaves tiny shavings resembling those from a plane.
If it’s creating dust, one of two things are happening:
1. The scraper is not sharp enough.
2. You’re not using the scraper properly
I always use my scraper without a holder. That way I can put a slight bend in it, so I have better control over where the shavings are coming from. A slight bow helps to avoid unintended scratches from the sharp corners.
A scraper is easy to control and gets into tight spaces that a round orbital sander can only dream about going.
Where You Use Scrapers
Scrapers have a lot more uses than you may think, such as:
– Flushing up a face-frame to a plywood side. I bow the scraper to make sure that I am removing solid wood and not the veneer next to it.
– Trimming off the extra lip of edge banding that I missed with the edge band trimmer.
– Scraping clean a veneer Dutchman whenever I replace a sanded-through patch. A few strokes of a cabinet scraper gets the Dutchman to the same thickness as the surrounding veneer.
Summary
Don’t fret if you begin with inconsistent results. Remember the adage: Practice makes perfect.
Related Posts
5 Project Plans with Accuride Slides
June 6th, 2023
Has Your Drawer Slide Lost Its Smooth Movement?
June 5th, 2023
