Slideology 101: How to Install a Drawer Slide in Five Easy Steps
- Accuride slides are top-quality and easy to install.
- Before starting any installation project, make sure you have all the necessary tools to install your slides.
- Installing Accuride slides like the 3832E Classic can be installed with just five simple steps.
Accuride prides itself on the ease that comes with installing its drawer slides. To help convey that, we want to show how you can install a drawer slide in as few as five steps.
To simplify this process, we went with a popular and conventional slide: The 3832E Classic. The 3832E has been a go-to for decades thanks to its versatility, resilience, and many options. (You can see those options on the 3800 family page.)
Some quick background info about the 3832E:
- Handles loads up to 100 lbs.
- Full-extension
- Available in even lengths from 6 to 28 in
- Supports drawers up to 24 in. wide
- Includes a lever to disconnect drawer members
- Available in clear zinc, white, or black finish
- Includes a hold-in detent to prevent drawer roll-out
The 3800 Series includes many other variants, including those with Touch Release, Easy-Close, Self-Close, and over-travel.
Before starting, make sure you have all the necessary tools to install your slides.
Now to the installation process!
Step 1:
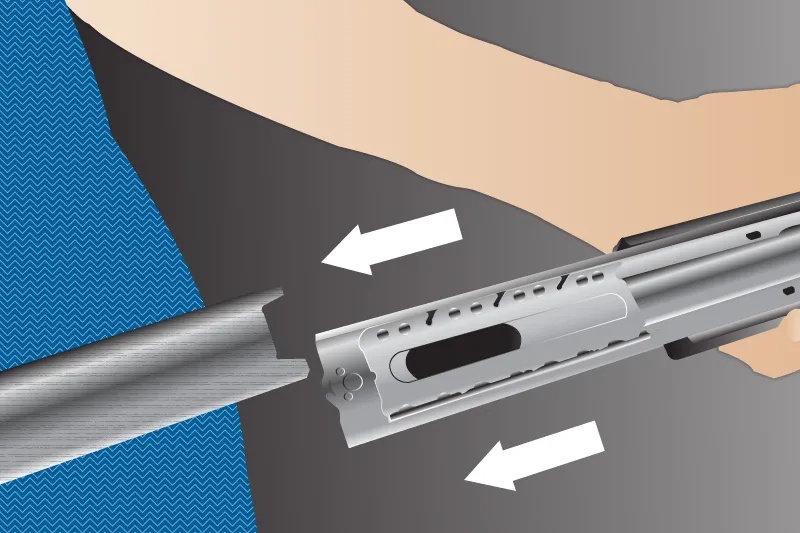
Your slide has a small inner (drawer) member, a large outer (cabinet) member, and an intermediate member in between them.
To separate the members, locate the disconnect lever, and the release direction stamp on the drawer member, then lift the lever and pull the drawer member out from the intermediate member.
Step 2:
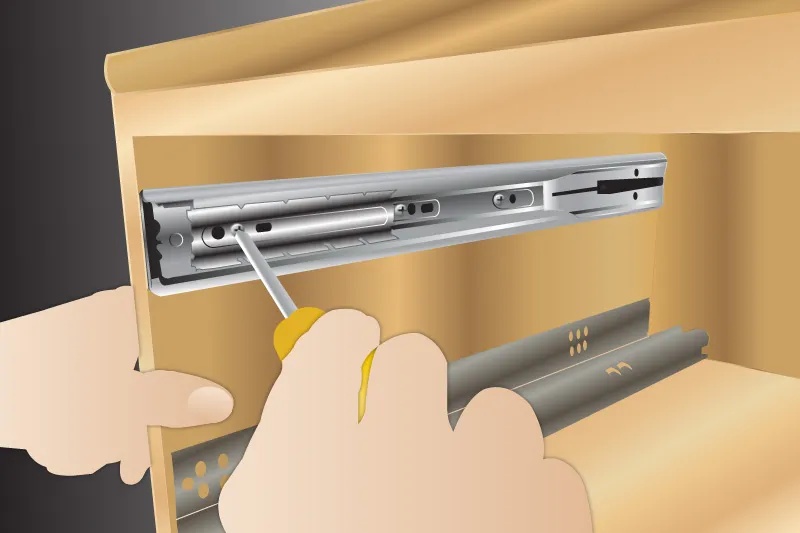
Install outer/intermediate member assembly onto the inner cabinet surface. With the proper screws, attach the slide in place via the horizontal slots in the cabinet (outer) member.
Step 3:
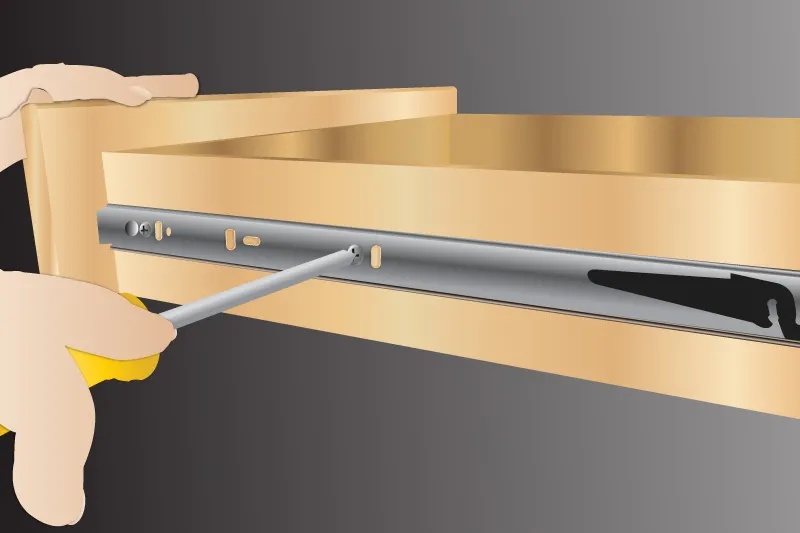
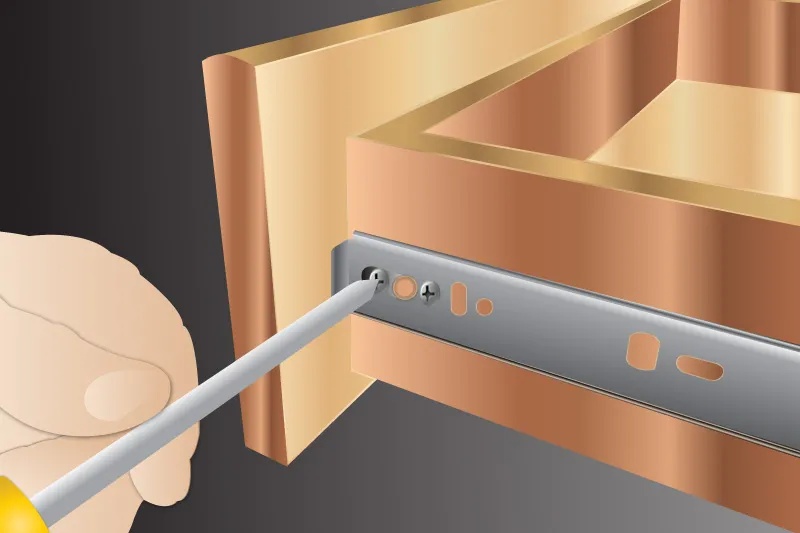
Install the inner (drawer) members onto the outside drawer surfaces. Insert a screw through the cam adjuster and through a hole or slot at the rear.
Step 4:
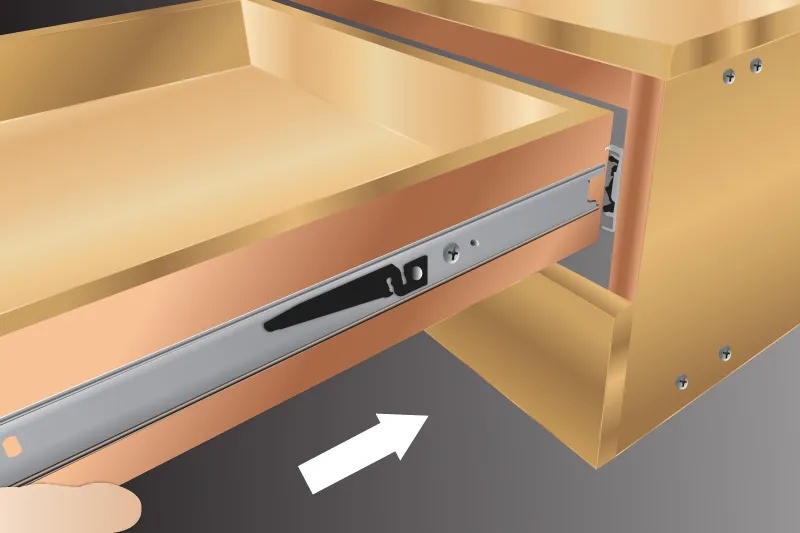
Install the drawer in the cabinet and close it. Make sure the intermediate slide member ball retainers are fully forward before you install.
Step 5:
Open the drawer and if necessary rotate the cam with a Phillips or Pozi screwdriver to vertically position the drawer in relation to the cabinet. Install any additional screws to fix the drawer in place.
There you have it! A quick intro guide to installing a side mount drawer slide.
For more woodworking information and solutions, stay connected to Accuride!
Related Posts
5 Project Plans with Accuride Slides
June 6th, 2023
What is Progressive Movement in a Slide?
June 5th, 2023
Has Your Drawer Slide Lost Its Smooth Movement?
June 5th, 2023
